11 - Implement Azure Key Vault (5 min)
In this walkthrough, we will create an Azure Key vault and then create a password secret within that key vault, providing a securely stored, centrally managed password for use with applications.
Task 1: Create an Azure Key Vault
-
Sign in to the Azure portal.
-
From the All services blade, search for and select Key vaults, then select +Create.
-
Configure the key vault (replace xxxx in the name of the key vault with letters and digits such that the name is globally unique). Leave the defaults for everything else.
Setting Value Subscription Use default supplied Resource group Click on Create new
Name: 11-key-vaultKey vault name keyvaulttestxxxx Location East US Pricing tier Standard Note replace xxxx to find a unique name.
-
Click Review + create, and then click Create.
-
Once the new key vault is provisioned, click Go to resource. Or you can locate your new key vault by searching for it.
-
Click on the key vault Overview tab and take note of the Vault URI. Applications that use your vault through the REST APIs will need this URI.
-
Take a moment to browse through some of the other key vault options. Under Objects review Keys, Secrets, Certificates, Under Settings review Access configuration, Networking.
Note: Your Azure account is the only one authorized to perform operations on this new vault. You can modify this if you wish in the Settings and then the Access policies section.
Task 2: Role Based Access Control
-
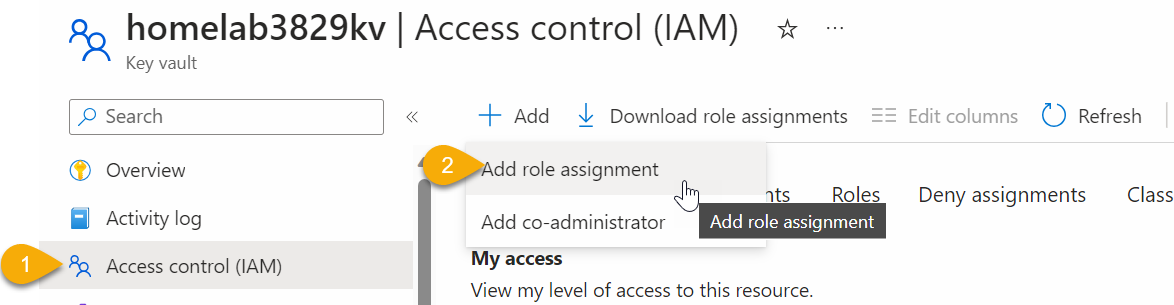
Locate Access Control (IAM) in den Submenu and click on Add / Add Role Assignment.
-
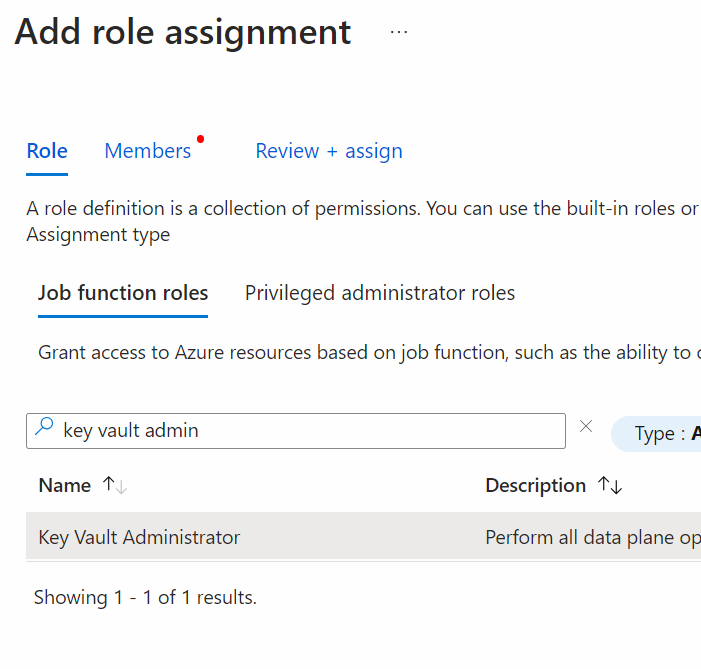
Search for the role Key Vault Administrator and select it. Click on next.
-
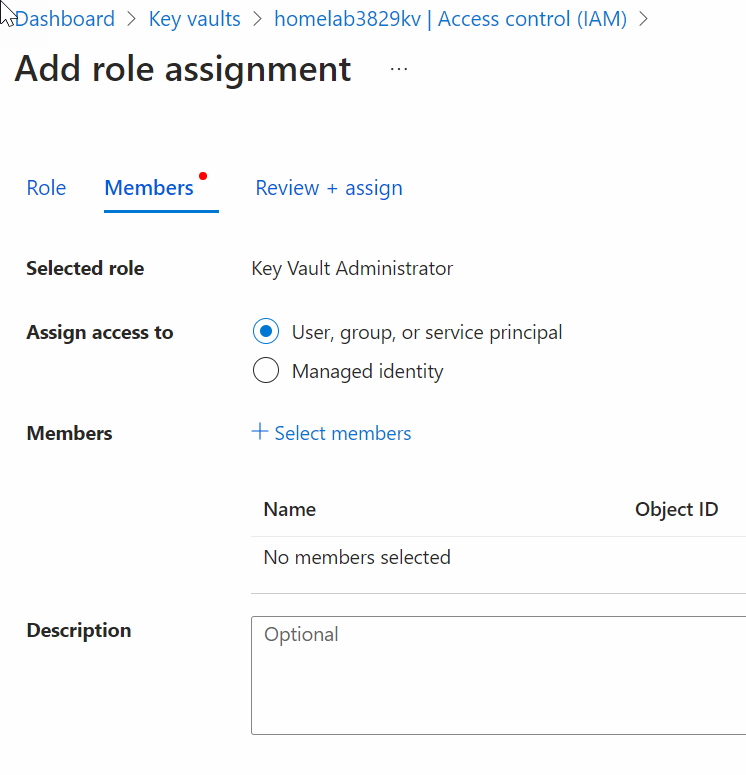
Select members and search for your admin Account. Add it to the Key Vault Administrator Group. Click on Review & Assign and finish this procedure.
Task 3: Add a secret to the Key Vault
In this task, we will add a password to the key vault.
-
Under Objects click Secrets, then click + Generate/Import.
-
Configure the secret. Leave the other values at their defaults. Notice you can set an activation and expiration date. Notice you can also disable the secret.
Setting Value Upload options Manual Name ExamplePassword Value hVFkk96 -
Click Create.
-
Once the secret has been successfully created, click on the ExamplePassword, and note it has a status of Enabled
-
Select the secret you just created, select the single secret entry under Select Version , note the the Secret Identifier. This is the url value that you can now use with applications. It provides a centrally managed and securely stored password.
-
Click the button Show Secret Value, to display the password you specified earlier.
Congratulations! You have created an Azure Key vault and then created a password secret in that key vault, providing a securely stored, centrally managed password for use with applications.
Note: To avoid additional costs, you can optionally remove this resource group. Search for resource groups, click your resource group, and then click Delete resource group. Verify the name of the resource group and then click Delete. Monitor the Notifications to see how the delete is proceeding.